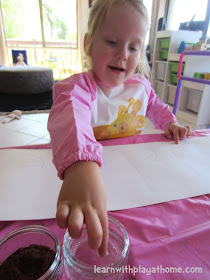
To help my daughter (aged 4) practice writing her name, I thought I'd give her a fun sensory experience to entice her to want to learn. It was a huge success and one of the few activities she has pleaded with me on more than one occasion, to repeat. As a result, I changed the experience slightly each time so now we can share with you, 3 different ways that you could make your "Chocolate" Name!
Ages: 2+
(See the Handy Tips at the bottom for ways to simplify or extend to meet your child's needs)
1st Way
Materials: Paper, Marker, Cocoa, Glue, Paintbrush, Shaker
If you're working with kids and cocoa then you have to let them experience it.
What does it smell like? "Mmmmm." What do you think it will taste like? "ewww! haha"
She found it quite funny that it wasn't as expected.
(We tried first sprinkling it on with a spoon and it was just a bit too messy. We switched to a mini shaker and it worked so much better)
Write the child's name on the paper and have them trace over the letters with the glue dipped paint bush
Shake the cocoa over the glue name
This way is reasonably messy! Be careful shaking the cocoa off
(I took the paper outside to shake off)
The result looked great though. (Cocoa can smudge easily)
And it smelt even better!
2nd Way
Materials: Paper, Marker, Cocoa, Water
This was a fun process that my daughter enjoyed.
1st the child dips their finger in the water and then in the cocoa.
She then finger painted using the repeated dipping process over the written letters of her name.
The end result wasn't as dramatic as the first way but it was thoroughly enjoyed.
3rd Way
Materials: Paper, Cocoa, Water, Paintbrush
This time we mixed a small amount of water with cocoa to make a "chocolate paint"
On this 3rd experience with the activity, I did not write her name on the paper first to be traced.
After practicing she was confident to attempt this writing on her own.
It went on thick and bold and was probably the favourite way of all 3
We found that when all 3 ways dried, they didn't flake off and stayed on the paper well.
To ensure this you could add a small amount of glue to the "chocolate paint" mixture or spray with hairspray when finished. This was unnecessary for us.
After writing practice, it's fun to just have free play and experiment with the materials.
Chocolatey finger painting was fun!
Handy Tips
- Simplify this activity by allowing your child to try single letters. The first letter of their name is a good place to start. The 3rd way ("chocolate paint") would be most suitable for younger children.
- Extend this activity by having your child write their name without tracing over the letters. Even figuring out spacing and sizing on various different sized papers will have them thinking and learning. You could also use any of the 3 ways for writing spelling words, practicing maths concepts.. anything involving writing really.
- Mix it up by providing the children with some cocoa, glue and water and see what they are able to come up with on their own
- Use appropriate language to encourage language development and understanding. Words such as, texture, bitter, scent, taste, smooth, smudge etc
- Here are some other posts of ours that include fun ways we've used to practice learning our name/letters:
(click on the pictures to go to the post)
Happy playing,
Debs :)
Look where else we are. Are you following along? :)
New Here? Subscribe to get all activities sent directly to you


